


Whenever you need to record a quick message to yourself or someone else, the stock Voice Recorder app on the Galaxy Note 2 does a fine job. However, the situations when you need it the most are when you forget or don't care to actually use it, like during a heated argument or a random police stop where your words can be misconstrued or altogether unheard.
While these situations don't happen all of the time, it's a good idea to prepare for them. Lifecap, from Android developer i.shadrin, runs in the background recording everything around you. Using very minimal battery power, Lifecap works to capture all of those important moments in your life, at all times, effectively turning your phone into a personal "black box" audio recorder.
Note that while this app should be compatible with all Android devices, we experienced incompatibility issues with phones running custom ROMs. Let us know if the comments if you weren't able to download this app and what device and ROM you were using.
Please note that laws vary from state-to-state as to the legality of recording without the other party's consent. Refer to the this guide for more information.
Step 1: Record & Listen
To begin recording, open the app and tap Start Recording. You can monitor whether or not Lifecap is recording in the background by checking for its notification is your pull-down tray.
After you've recorded a some audio, go to Cache to listen to it. Select a specific time to start listening—anytime from when you first started recording up to the current time (the app utilizes 24-hour military time).
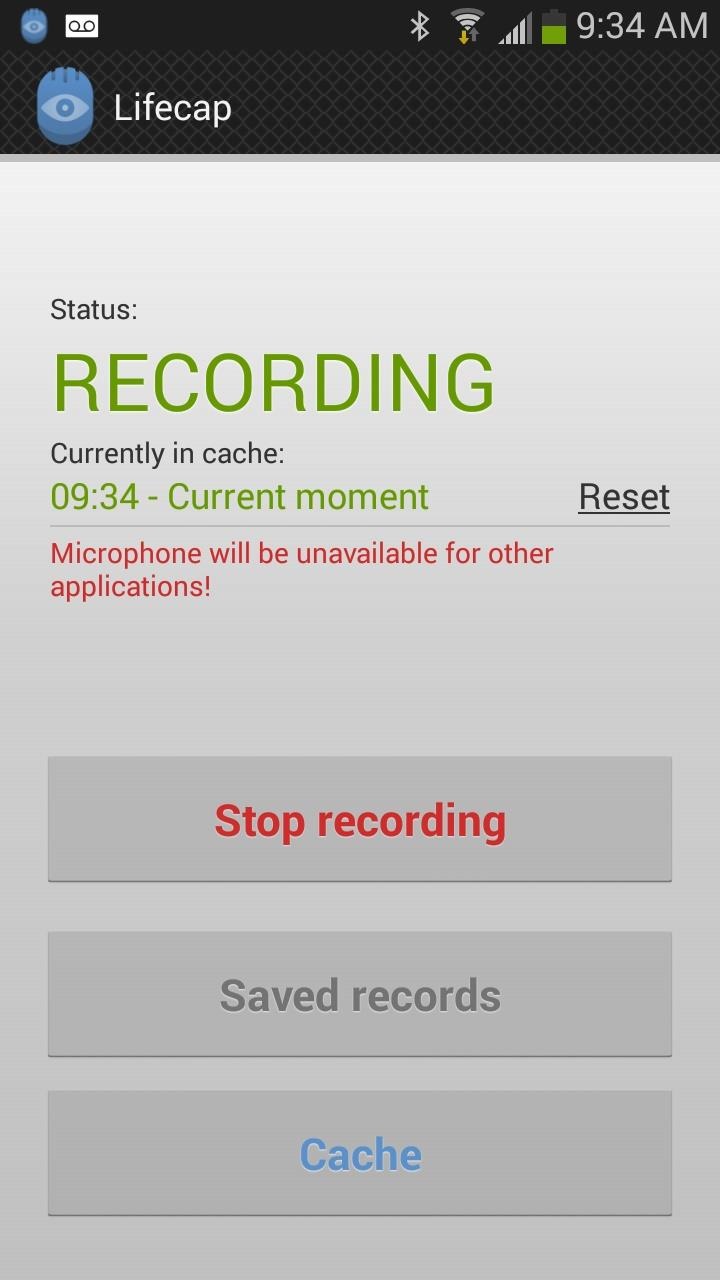

Note: Since this application uses your microphone, it will be unavailable for other apps during recording.
Step 2: Save Your Recordings
To save audio recordings, tap on Save Fragment on the bottom of theCache page. Use the play button to listen to audio, select start and stop points for your recording by tapping on the location icon, and once you've selected a time frame for your recording, tap the save icon.
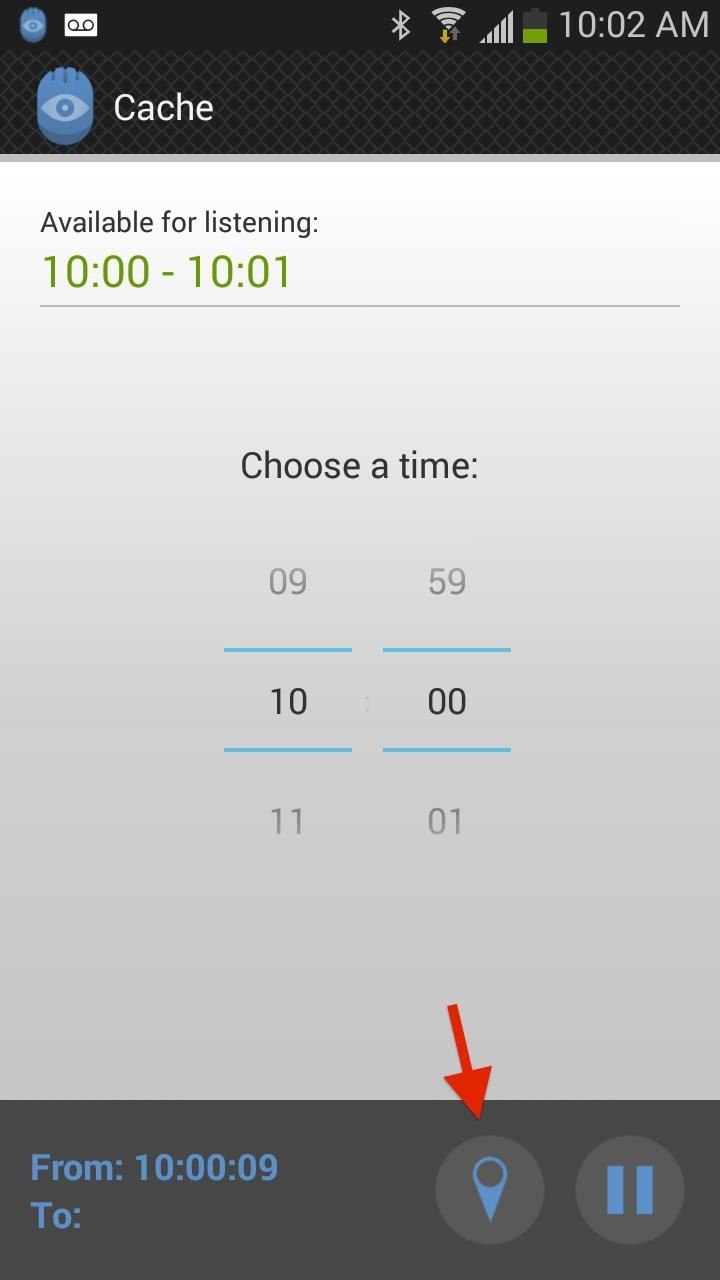
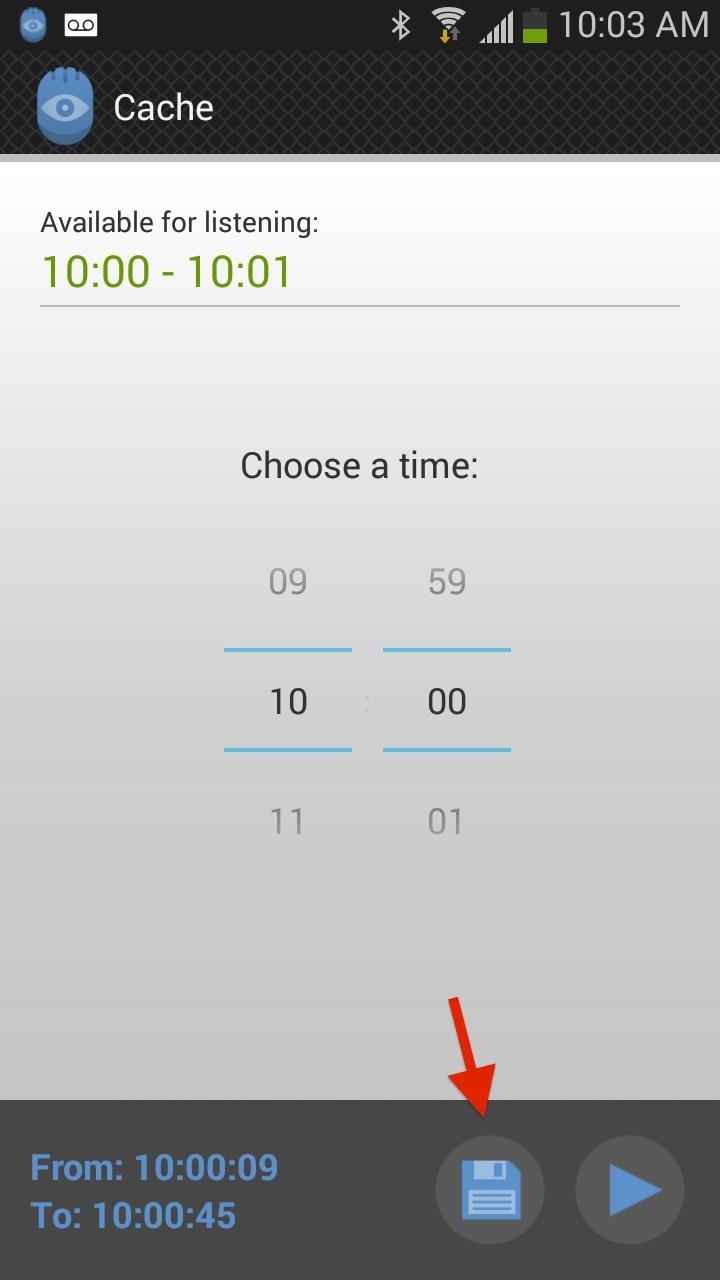
[1] Location icon, [2] Save icon
Step 3: Playback Your Saved Recordings
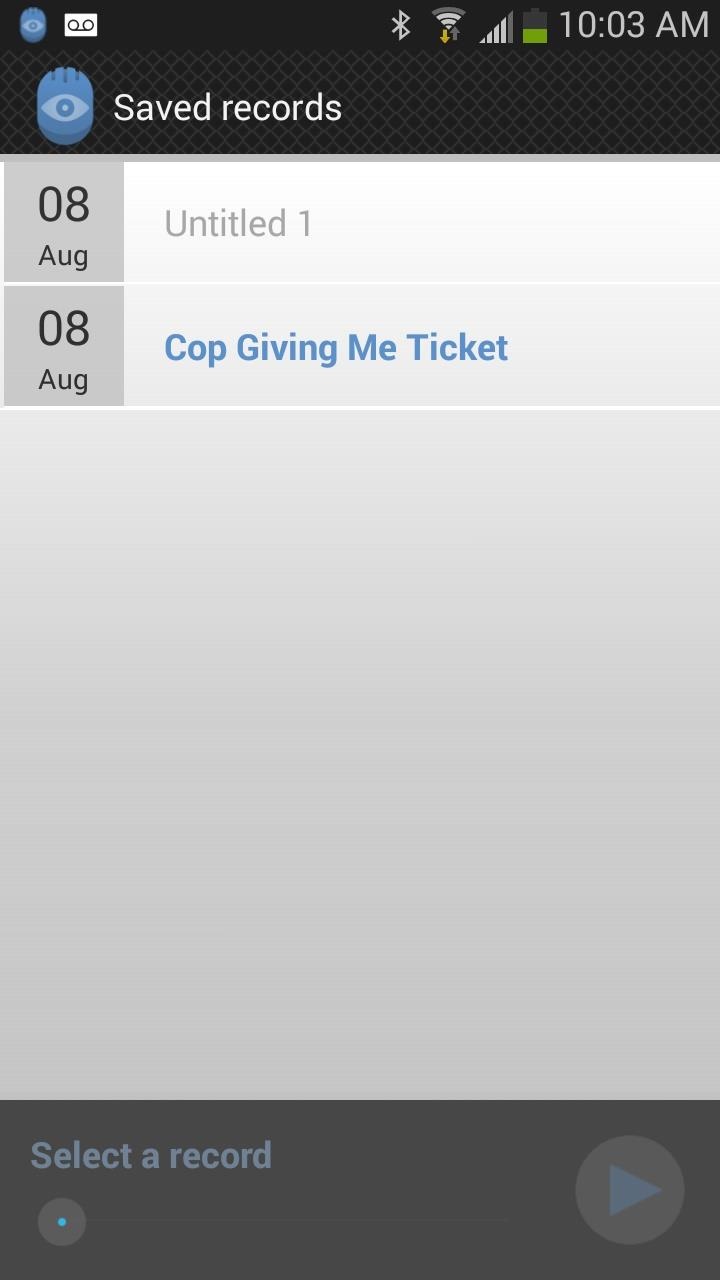
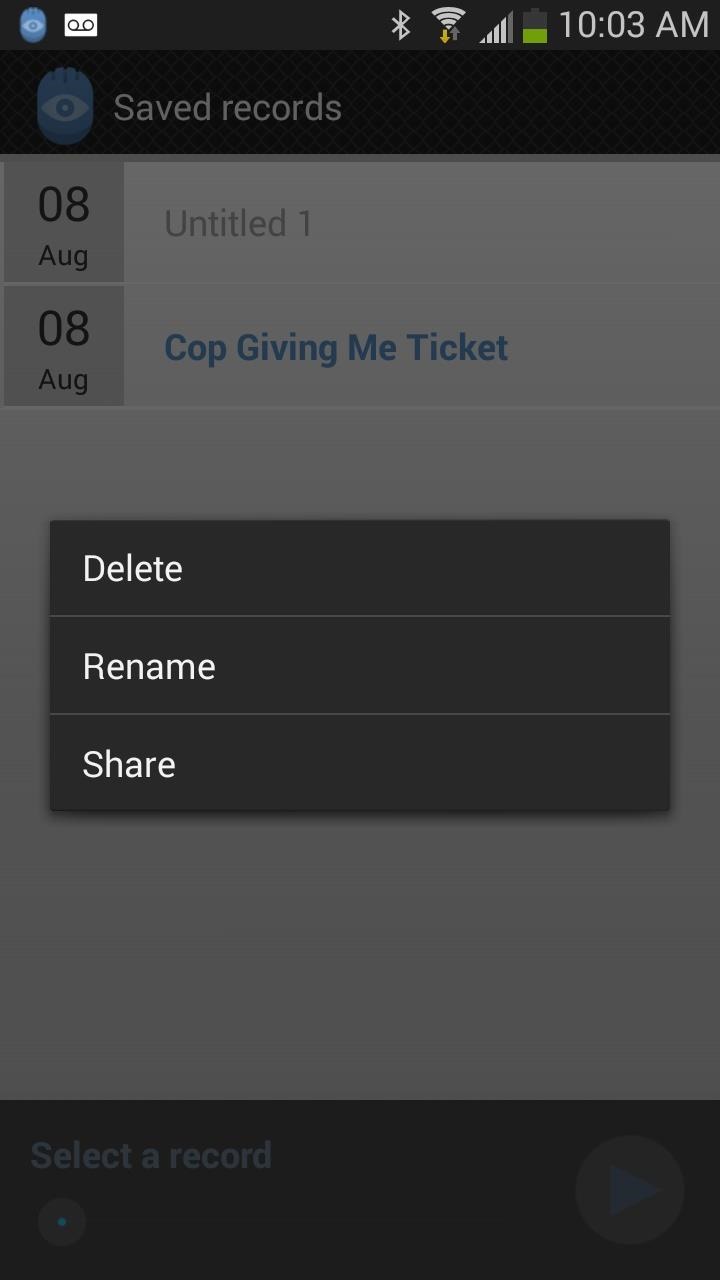
View saved recordings by going to Saved records back on Lifecap's main page. Tap on a recording to listen to it, or hold down on it to delete, rename, or share it.
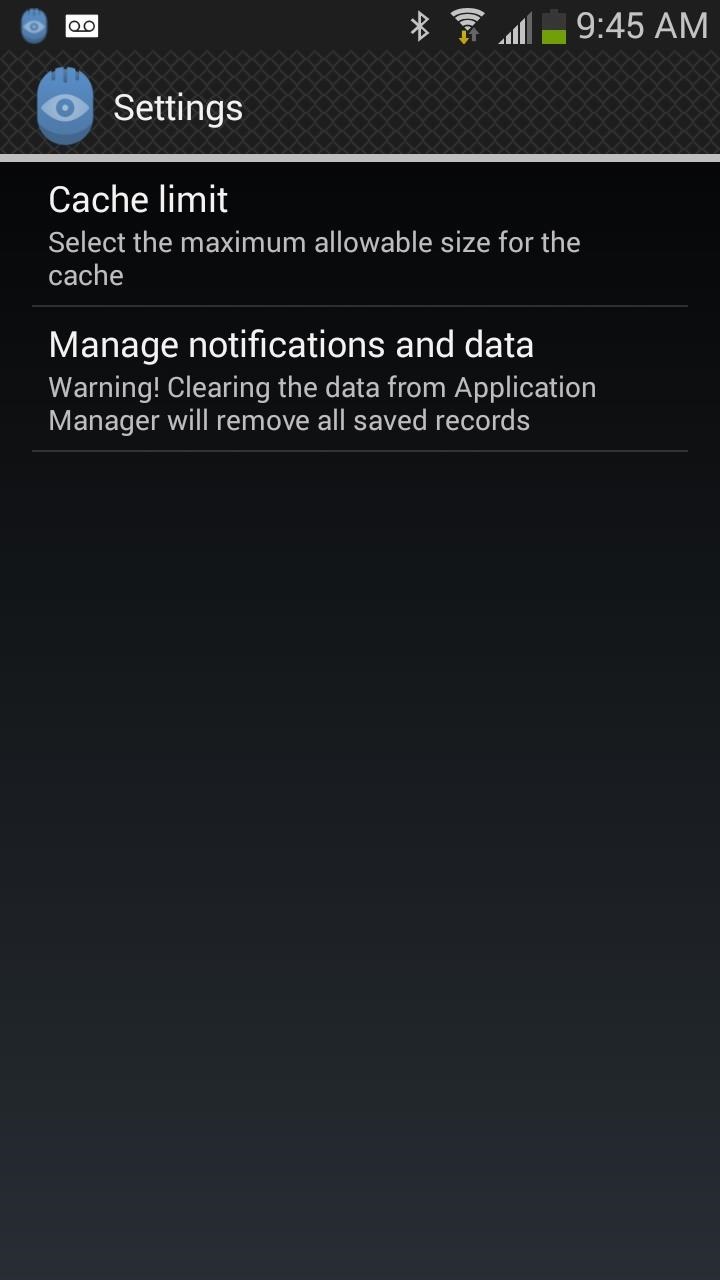
Step 4: Manage Recordings & Cache
As recordings build up, you'll want to clear the cache so that you can create new recordings, which you can do by tapping on Reset.


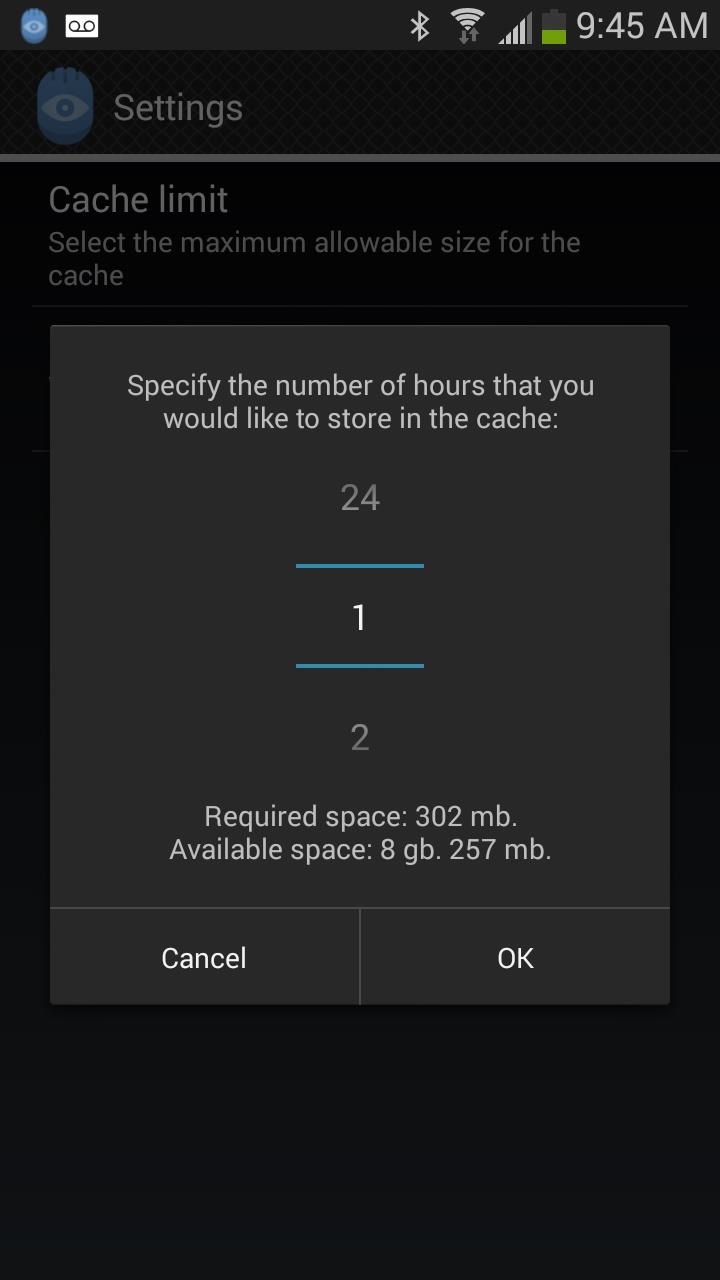
By default, Lifecap limits the amount of stored cache to one hour, but you can change that by going to the Settings and selecting from 1 hour to 24 hours. You'll also see the amount of space required versus the amount of available space on your device.
Note: In order to change the cache limit, you'll need to purchase the full version of Lifecap, which runs for $4.99 through an in-app purchase.
Lifecap works especially well because of it's minimal UI and the fact that it's not a total battery hog, using less than 15% per day. College students and professionals alike can benefit from an application like this, whether it's to record a lecture in class or a meeting at work.


0 comments:
Post a Comment